

How to Prevent Weft Fraying on Hair Bundles
A loose thread along your bundle's seam deserves attention before your next install. To help prevent weft fraying, start with the weft construction, then reduce the cutting, pulling, and friction that can weaken it.
Gentle care can reduce damage, but no method guarantees a fray-free bundle. Before reaching for scissors or sealant, check how your manufacturer says the weft should be handled.
Key Takeaways
- Confirm your weft type before cutting, folding, or sealing it.
- Support the seam during detangling, washing, installation, and removal.
- Use only manufacturer-approved products and methods, and ask for help when stitching starts opening.
Fraying involves damage to the seam or its threads. Shedding means hairs are coming loose, which can happen with or without visible seam damage.
Identify Your Weft Type Before Handling It
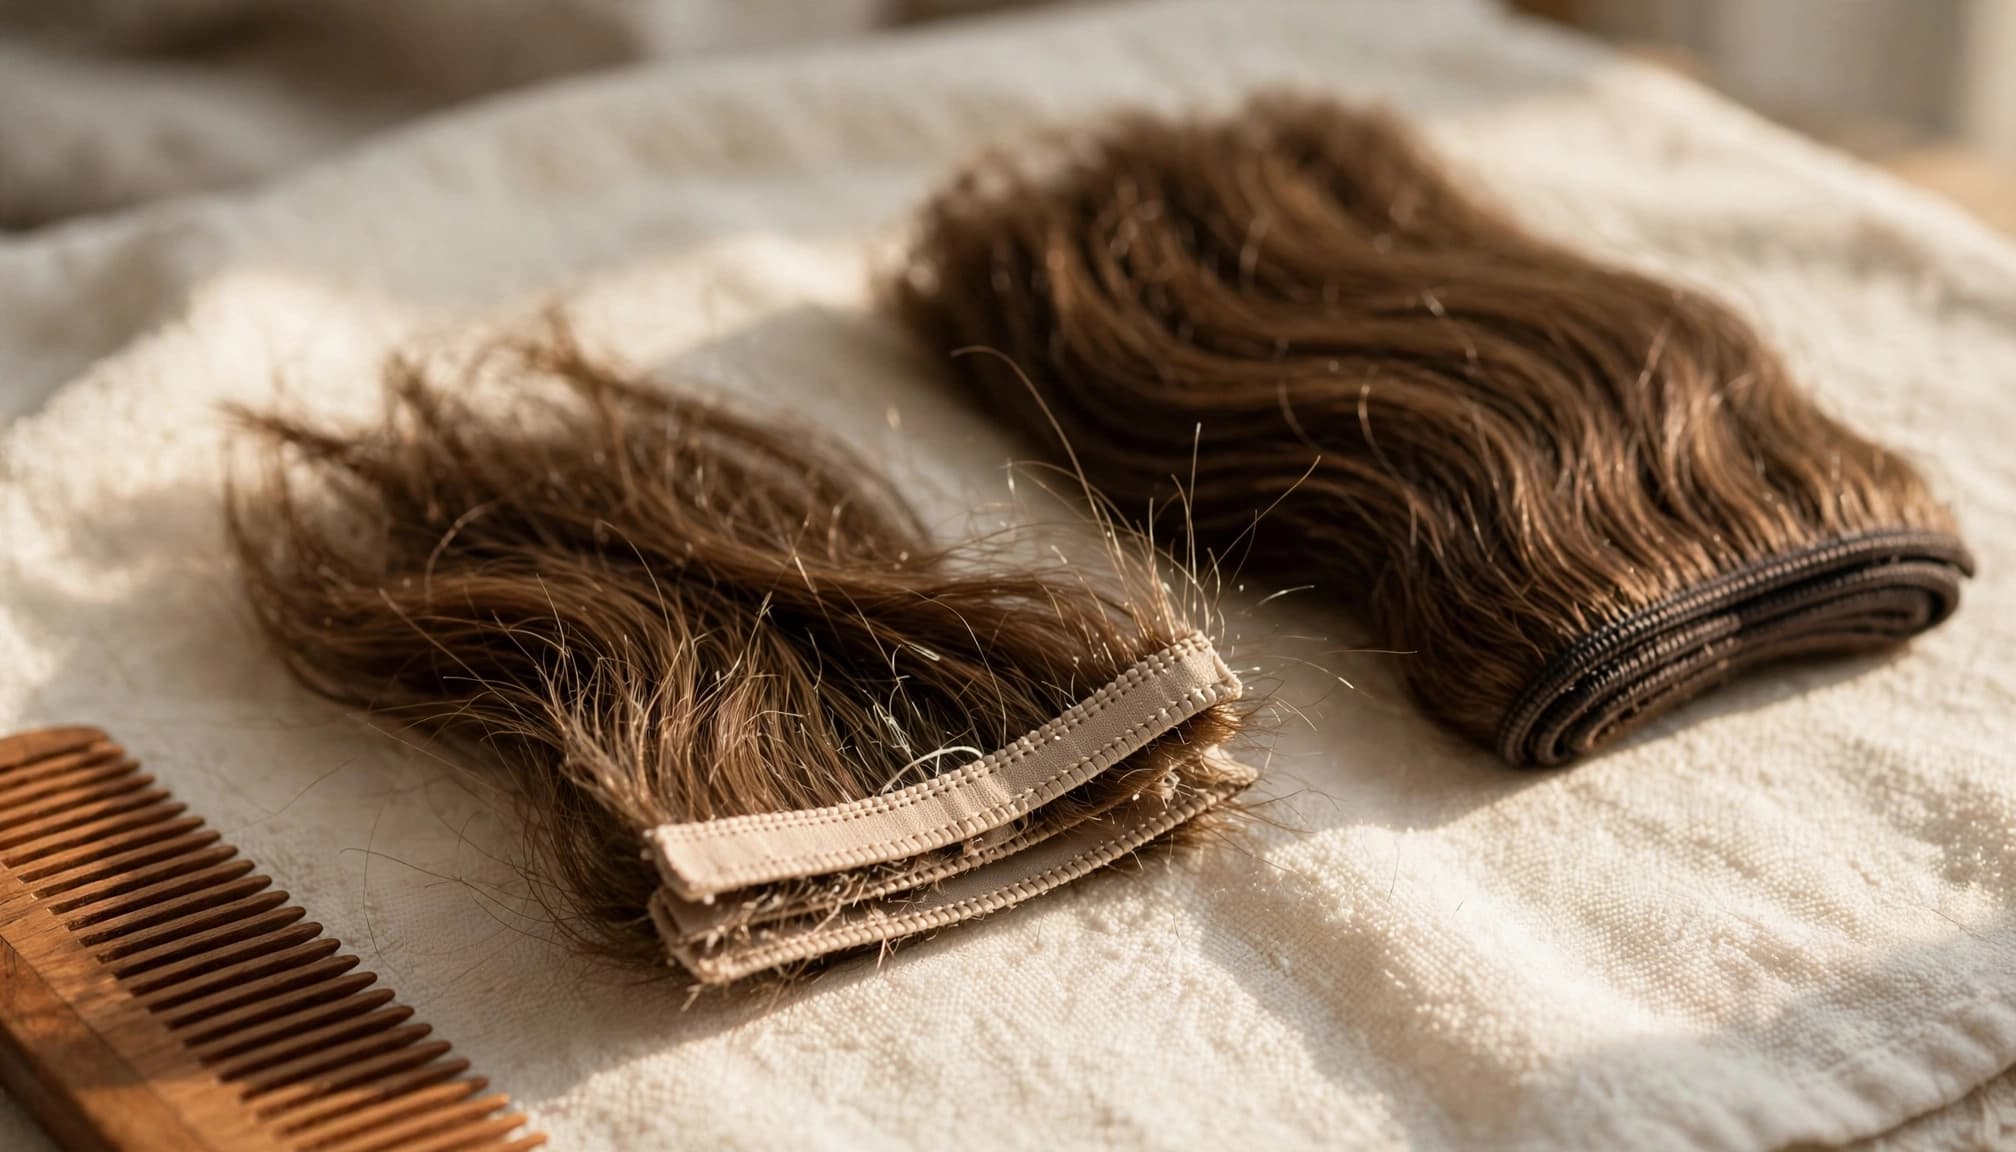
Machine-made wefts
Machine-made wefts hold the hair together with a stitched seam. They're generally thicker than hand-tied wefts, and many allow cutting to fit an installation. However, permission to cut doesn't establish how to finish the ends.
Double-weft construction also doesn't make a bundle immune to damage. Luxegan's Brazilian body wave Remy bundle lists a machine double weft, so check its product-specific guidance rather than following instructions for hand-tied hair.
Hand-tied, flat, and newer weft designs
Hand-tied wefts have a finer construction. Cutting some hand-tied seams can loosen the structure and allow it to unravel. Don't cut yours unless the manufacturer explicitly permits it and explains the required finishing method.
Other products use names such as flat weft, hybrid weft, or Genius weft. Those labels don't establish a universal cutting or sealing rule. Perfect Locks' weft construction guide distinguishes several extension types, but your exact product's instructions should determine your approach.
If the packaging doesn't identify the construction, ask the seller before altering the bundle. Hair texture and labels such as "Remy" don't tell you how its seam is built.
Cut or Seal Wefts Only With Product-Specific Approval
Plan the installation before making cuts
Keep the weft intact until you've measured the intended placement. Every cut creates another exposed end, so avoid dividing a bundle into small pieces unnecessarily.
If cutting is permitted, follow the maker's directions for the tool, cut location, and end treatment. Don't cut through an attachment, knot, or reinforced section without approval.
For wefts that shouldn't be cut, ask a trained installer whether the design allows folding or stacking. Forcing a thick fold into a tight space can create discomfort and concentrate pressure along the seam.
Treat sealant as an optional, approved step
Some bundles may allow a weft sealant; others may need no additional treatment. Use only a product the bundle manufacturer approves, following its application and curing instructions.
Keep sealant away from your skin and scalp. Don't substitute nail glue, household adhesive, hot glue, or an improvised chemical treatment. Their suitability for the hair, stitching, and skin hasn't been established.
Approval to cut a weft doesn't automatically mean approval to glue it.
Don't burn loose threads or use a flat iron to "seal" the edge. Heat can damage the construction, and shortening a thread may remove part of the stitching holding the bundle together.
Install Without Concentrating Tension on the Seam
A tight installation can strain both the weft and your natural hair. These are separate concerns: intact stitching doesn't mean the style is safe for your scalp.
Before installation, inspect the full seam under good light. Look for open stitching, separating layers, or ends that have started unraveling. Photograph concerns and contact the seller before modifying a new bundle.
During a sew-in, avoid repeatedly piercing or sawing through the same seam section. The correct stitch placement depends on the weft and installation method. Alpha Hair's weft installation guide discusses machine, Genius, and hand-tied options.
Ask your installer to distribute the weight and avoid pulling the row tighter to compensate for a weak attachment. Pain, persistent pulling, or scalp irritation warrants prompt attention, not a waiting period to "break in" the style.
Likewise, don't attach clips or other hardware through a fragile section without the maker's approval.
Detangle Without Pulling at the Weft

A snag transfers force toward the seam when you pull through it. Supporting the hair above the tangle reduces that strain.
For loose bundles, use this sequence:
- Lay the bundle on a clean surface and support the upper hair without tugging on the stitching.
- Separate tangles gently with your fingers, starting near the ends.
- Work upward in small sections with the brush or comb recommended for the texture, stopping whenever it catches.
Hand-Tied Extensions Co.'s brushing and washing instructions recommend starting at the ends and avoiding excessive pulling. Apply that gentle approach while choosing tools suited to your bundle.
Curly hair may need finger-detangling or a wide-tooth comb under the manufacturer's recommended conditions. Don't force a brush through tight curls to match a straight-hair routine.
For installed extensions, support the row while detangling the lengths. Avoid dragging teeth or bristles across stitching, beads, or attachment points. If a knot has formed directly against the seam, let a stylist assess it before you pull.
Shop Best Sellers
-
Short Goddess Faux Locs Wig | Brown Highlight Crochet Dreadlock Wig
Regular price From $158.00 USDRegular price$190.00 USDSale price From $158.00 USDSale -
30 Inch Burgundy 99J Curly Human Hair Wig | 13x6 Lace Frontal | 200% Density
Regular price From $257.00 USDRegular price$0.00 USDSale price From $257.00 USD -
12A Deep Wave Remy Human Hair Bundles | 30 to 32 Inch Weft Extensions
Regular price $364.00 USDRegular price$0.00 USDSale price $364.00 USD -
#350 Knotless Box Braids Wig | Short Lace Frontal Bob | Dark Ombre Ginger
Regular price $262.50 USDRegular price$0.00 USDSale price $262.50 USD -
Short Afro Faux Dreads Wig | Synthetic Braided Wig for Men and Women
Regular price $90.00 USDRegular price$120.00 USDSale price $90.00 USDSale -
12A Raw Vietnamese Bouncy Wave Wig | 13x4 Lace Frontal | 250% Density
Regular price From $242.00 USDRegular price$0.00 USDSale price From $242.00 USD -
Men's Wingtip Derby Shoes | Genuine Leather Colour Block Lace-Ups
Regular price $263.00 USDRegular price$301.00 USDSale price $263.00 USDSale -
Brazilian Human Hair 13x4 Lace Front Wig | Glueless, Pre-Plucked with Baby Hair
Regular price From $99.00 USDRegular price$132.00 USDSale price From $99.00 USDSale







Wash and Dry Without Roughing Up the Stitching
Smooth cleanser through the hair
Detangle before washing when your product's care instructions recommend it. Then use the approved cleanser and water temperature.
Smooth shampoo through the hair in downward strokes rather than rubbing the bundle into a tangled ball. Clean the weft gently and rinse thoroughly, since residue can collect around stitching and attachments.
Condition according to the product directions, generally focusing on the lengths rather than loading the seam with heavy product. Don't soak the bundle for long periods unless instructed. A universal wash schedule won't suit every texture, installation, or styling routine.
Support loose bundles and dry installed rows thoroughly
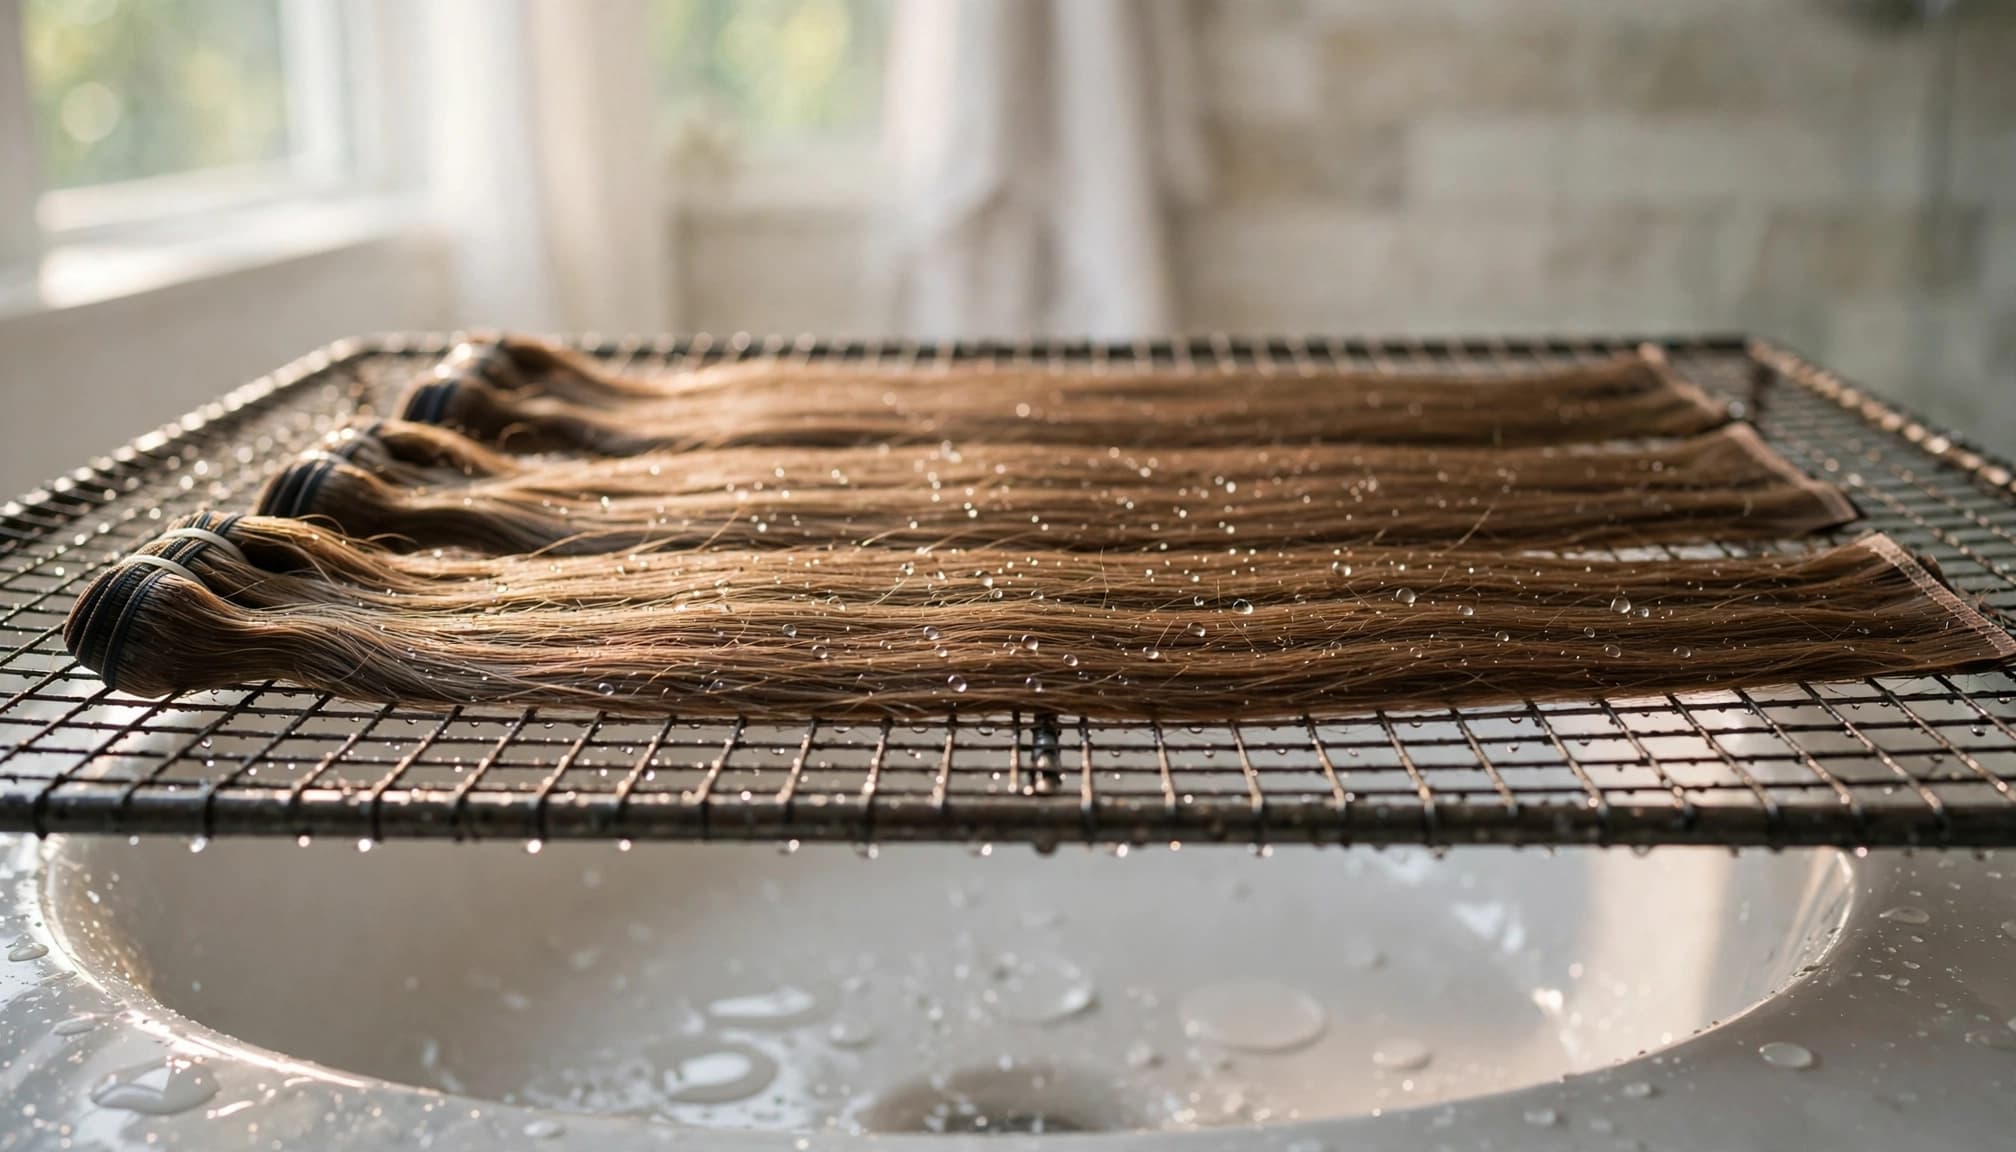
After rinsing, gently squeeze water through the lengths without twisting the weft. Blot with a towel instead of scrubbing.
For removable bundles, support the hair while it dries in the position the manufacturer recommends. Don't hang a wet bundle by a damaged edge or tightly clamp its stitching.
Installed rows need thorough drying around the roots and attachments. Follow your installer's drying instructions, using a dryer only when permitted. Keep the nozzle moving rather than directing concentrated heat at the seam.
Don't sleep with damp extensions or pack wet bundles into storage.
Limit Heat, Nighttime Friction, and Storage Damage
Heat limits apply to the specific hair product. They aren't permission to press a hot tool against the weft.
For example, Luxegan's Brazilian curly human-hair bundles advise keeping flat-iron heat below 150°C. That guidance applies to those bundles, not every extension. Keep hot tools away from stitching, adhesives, and attachment hardware.
Likewise, don't apply bleach, dye, relaxer, or remover to the seam without explicit approval. Human hair may tolerate a treatment that the weft materials or bonding components don't.
At bedtime, secure installed lengths loosely using your stylist's recommended method. A satin bonnet or pillowcase can reduce rubbing, but it won't correct a tight installation or damaged seam.
Store removable bundles completely dry and detangled. Arrange them loosely in a clean storage bag rather than crushing the weft beneath accessories. Alpha Hair's weft maintenance guidance covers brushing, drying, sleeping, and storage as connected parts of extension care.
Respond Early When You Notice Fraying
Short hairs near the top of a bundle aren't always evidence of damage. Some constructions include short return hairs near the seam. Check for loose stitching, a widening gap, or an edge that's visibly coming apart.
If you notice a loose thread, don't pull it to find out how far it runs. Stop brushing that area and take clear photographs for the seller or installer.
Don't trim the thread automatically. It may be part of the seam's structural stitching. Covering it with adhesive can also make inspection or repair harder.
A stylist may be able to assess repair options, but that depends on the construction and damage. A weft with an opening seam may need replacement rather than another installation.
During removal, distinguish installation thread from the bundle's own stitching before cutting anything. Remove adhesive with the approved product and method instead of peeling it away forcibly. If you can't see the attachment clearly, professional removal is the safer choice.
Frequently Asked Questions
Does every bundle need weft sealant?
No. Sealant is appropriate only when the manufacturer permits it and provides instructions for the exact construction. An intact factory-finished weft may need no extra treatment. Applying an unsuitable product can introduce stiffness, residue, or skin irritation without addressing the cause of damage.
Can I cut a hand-tied weft if I seal it afterward?
Don't assume sealant makes cutting safe. Some hand-tied products can loosen when their seam is cut. Follow the maker's explicit cutting and finishing directions, or ask an installer about an approved way to fit the uncut weft.
Does shedding mean the weft is fraying?
Shedding alone doesn't prove the seam is unraveling. Inspect the stitching as well as the hair loss. Increasing shedding alongside an opening seam or separating layers is a reason to stop handling that section and request an assessment.
Keep the Seam Protected Throughout Each Wear
The most dependable way to reduce weft fraying is gentle, construction-specific care. Protect the stitching during preparation, installation, washing, and removal rather than relying on an added sealant.
When a thread loosens, pause before cutting or gluing it. Early inspection gives you a better chance of addressing a small problem without creating more damage.