

How Long Can You Keep a Quick Weave In?
A quick weave usually lasts about 2 to 4 weeks, though some guides cite up to 4 or 5 weeks. Your actual wear time depends on the installation, scalp comfort, maintenance, and the condition of your natural hair.
Take it out sooner if tracks loosen, shedding increases, or your scalp becomes sore or irritated. Here's how to judge the wear time and remove the style without pulling at your hair.
Key Takeaways
- Plan on 2 to 4 weeks as a practical wear window, not a guarantee.
- Keep glue on the protective cap, never on your natural hair.
- Remove the weave when it sheds, lifts, feels uncomfortable, or becomes difficult to keep clean.
How Long a Quick Weave Usually Lasts
Indique gives a typical lifespan of 2 to 4 weeks, while StyleSeat says a quick weave can last about 4 to 5 weeks. These are estimates, not deadlines. Shedding is a clear sign that it's time to remove the style, even if you've worn it for less time.
What changes the wear time?
A neat installation with hair glue applied evenly to a protective cap, not natural hair, can last longer than one with loose tracks. Scalp comfort matters too: tight braids, itching, tenderness, or a burning feeling aren't reasons to push through for extra days.
Sweat, frequent handling, and moisture can loosen the adhesive. Pool chemicals and ocean salt can weaken the adhesive, according to StyleSeat. Hair that's already fragile or breaking also needs extra care, since a longer wear period and rough removal can add stress.
Signs it's time to take it out
Remove the style if you notice increasing loose hairs, tracks lifting, matting, persistent irritation, or an unpleasant odor. A visible or shifting cap is another sign the installation is no longer secure. Don't glue down loose tracks over and over to extend wear.
Quick Weave vs. Sew-In
A quick weave attaches hair extensions by bonding tracks with glue to a protective wig cap. A sew-in attaches extensions with needle and thread to braided natural hair. It takes about 1.5 to 2 hours to install, according to StyleSeat's quick weave guide, and Indique gives a similar estimate.
A sew-in usually lasts longer, but takes longer to install and can place more tension on the scalp because the hair must be cornrowed. Neither style is automatically right for everyone. Choose based on your hair's condition, comfort, and how long you want to wear the style. Human hair extensions can require more upkeep than synthetic options.
StyleSeat puts the cost at $60 to $160, depending on whether you install it yourself or visit a salon. Your needs and the service affect the final price.
Supplies and Hair Preparation
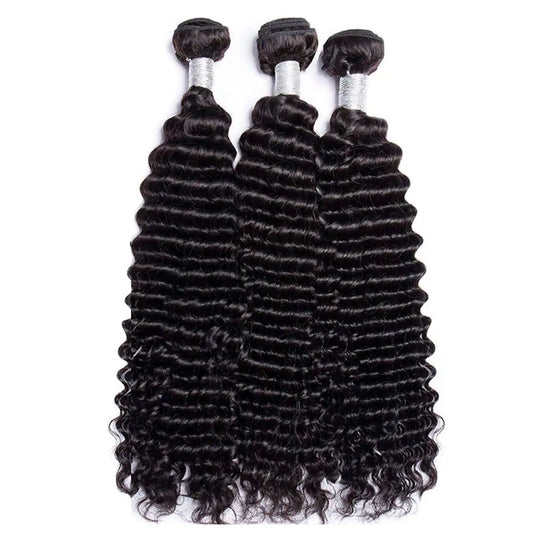
Gather two caps, hair glue, scissors, a comb, clips, and glue remover. You'll also need shampoo, conditioner, and tools to blow-dry or braid your hair. If you're choosing wefts for hair extensions, compare textures and lengths among human hair bundles for wigs and braids.
Prepare natural hair and protect it
Wash and condition your natural hair, detangle it, then make sure it's completely dry. Blow-dry it straight or braid it flat so the cap sits smoothly. Avoid installing over damp hair or an irritated scalp.
Wear two caps for extra protection. Apply a protective barrier, such as molding gel or liquid cap solution, to the wig cap, then apply hair glue to the cap. The barrier helps protect natural hair during take-down, but it doesn't make direct contact with natural hair safe.
Mark the opening
Before gluing tracks, mark the section of hair you want to leave out on the cap. After the tracks are in place, carefully cut that marked area to create an opening for your hair. Measure tracks against your head before cutting them; the right amount depends on your style and desired fullness.
Installing a Quick Weave at Home

A first installation can be tricky, especially around the part and hairline. Make sure your hair is dry, and blow-dry it fully if needed. If you're unsure about using glue or cutting the cap, ask a stylist to install it.
Set the cap and barrier
Put on both caps over your dry, flat hair, with the wig cap on top. Apply the protective barrier to the cap and let it dry according to the product directions. Mark the hair you plan to leave out before placing tracks.
Glue tracks from the nape upward
Measure and cut each weft to fit the section, then apply hair glue to the cap, not your natural hair. Start at the nape and work upward. Let each layer dry before adding the next, and hold each glued weft in place for 30 to 60 seconds until it feels secure. Once the wefts are set, cut open the marked opening and blend it gently.
Shop Best Sellers
-
Short Goddess Faux Locs Wig | Brown Highlight Crochet Dreadlock Wig
Regular price From $158.00 USDRegular price$190.00 USDSale price From $158.00 USDSale -
30 Inch Burgundy 99J Curly Human Hair Wig | 13x6 Lace Frontal | 200% Density
Regular price From $257.00 USDRegular price$0.00 USDSale price From $257.00 USD -
12A Deep Wave Remy Human Hair Bundles | 30 to 32 Inch Weft Extensions
Regular price $364.00 USDRegular price$0.00 USDSale price $364.00 USD -
#350 Knotless Box Braids Wig | Short Lace Frontal Bob | Dark Ombre Ginger
Regular price $262.50 USDRegular price$0.00 USDSale price $262.50 USD -
Short Afro Faux Dreads Wig | Synthetic Braided Wig for Men and Women
Regular price $90.00 USDRegular price$120.00 USDSale price $90.00 USDSale -
12A Raw Vietnamese Bouncy Wave Wig | 13x4 Lace Frontal | 250% Density
Regular price From $242.00 USDRegular price$0.00 USDSale price From $242.00 USD -
Men's Wingtip Derby Shoes | Genuine Leather Colour Block Lace-Ups
Regular price $263.00 USDRegular price$301.00 USDSale price $263.00 USDSale -
Brazilian Human Hair 13x4 Lace Front Wig | Glueless, Pre-Plucked with Baby Hair
Regular price From $99.00 USDRegular price$132.00 USDSale price From $99.00 USDSale





Removal and Natural Hair Protection
Use clear signs, not a target date
Remove the weave when it sheds, loosens, or causes discomfort. The American Academy of Dermatology's advice on preventing weave damage emphasizes protecting natural hair from extensions. Pain, persistent itching, or soreness are reasons to stop wearing the style and avoid added tension.
Loosen the glue, then lift slowly
Apply bonding glue remover to soften the hair glue, and leave it on for 10 to 15 minutes, following the product directions. Lift each track individually, then slowly remove the cap. Don't yank or peel tracks that still feel attached. Wash and deep-condition your natural hair afterward.
At-home removal can also involve an oil-based product and warm water running along the edges of the wig cap. Reserve oil for take-down, since an oil-based product weakens glue while you're wearing the style. StyleSeat recommends professional removal if you're unsure or the tracks won't release easily.
Common Mistakes to Avoid
- Gluing tracks directly to natural hair can cause breakage and make removal risky.
- Adding tracks before the previous layer dries can leave the installation unstable.
- Heavy or oil-based products can weaken the adhesive, so keep oil-based products away from glued areas while the style is installed.
- Keeping the style in despite shedding, pain, or a lifting cap can put extra stress on your hair and scalp.
Quick Weave FAQs
Can a quick weave get wet?
Water may loosen the glue, and pool chemicals or ocean salt can weaken it further. Avoid swimming to protect the installation, and don't soak the cap while washing.
Are quick weaves damaging to hair?
They can cause damage if installed or removed improperly. The biggest risk is glue touching natural hair, while tight braids and persistent tension can also irritate the scalp. Human hair can also be damaged by improper installation or removal. Stop wearing the style if it hurts.
Choose Comfort Over Extra Wear
A quick weave may last a few weeks, but the best wear time is the one your hair and scalp tolerate comfortably. Keep glue off your natural hair, watch for shedding or irritation, and remove the style gently when it starts to loosen.