

How to Remove a Sew-In Without Cutting Your Hair
You can remove a sew-in without cutting your natural hair by isolating and cutting only the attachment thread. The safest approach is to have a friend or stylist help, especially around the back of your head.
Patience matters more than speed. Pulling at a stubborn track or cutting through an unidentified bundle can cause breakage, even when most of the takedown has gone smoothly.
Start by identifying your attachment method and setting up a well-lit space where you can work section by section.
Key Takeaways
- Identify each attachment before cutting. For a traditional sew-in, isolate a visible stitch and make sure only thread is between your fingers and the scissor blade.
- Work one track at a time, starting at the nape. A helper or stylist is safer for areas you can't see clearly.
- After removing the wefts, undo the braids from the ends toward the roots and gently detangle trapped shed hair before washing.
- Stop if you feel pain, see bleeding, or can't separate an attachment from your hair. Get professional help for hidden knots or dense mats, and see a dermatologist for bald patches, sores, or ongoing tenderness.
Gather Your Sew-In Removal Tools
Have everything within reach before loosening the first track:
- Small scissors with a narrow blade let you reach isolated thread.
- Duckbill clips keep leave-out and loose extensions away from the working area.
- A rat-tail or pin-tail comb helps separate sections, while a wide-tooth comb handles later detangling.
- A wall mirror and handheld mirror improve visibility.
- Detangler, shampoo, deep conditioner, and a towel support the aftercare.
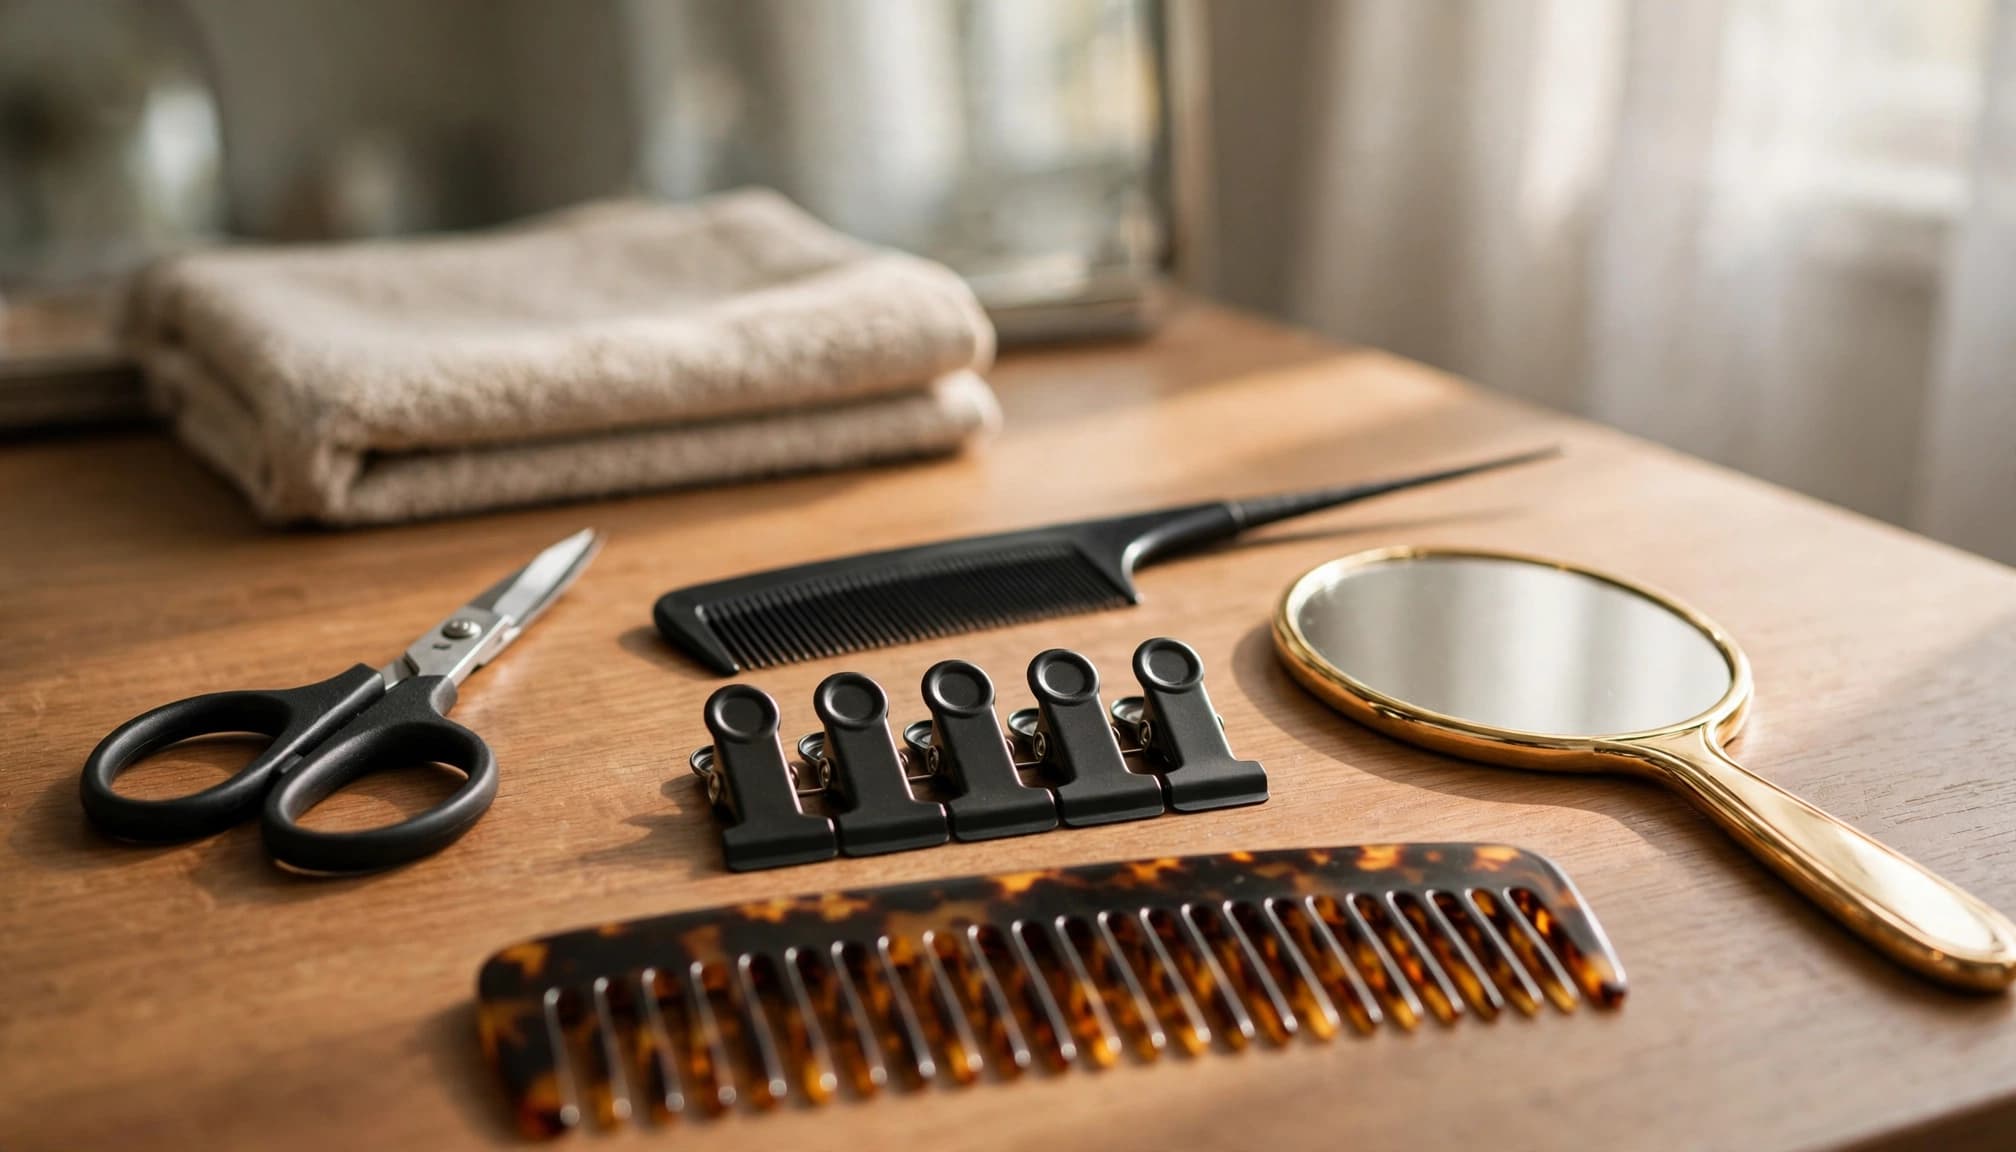
Some removal guides use an eyebrow shaper instead of scissors. However, an exposed razor can also cut natural hair, so it isn't a forgiving beginner tool.
Use bright, direct lighting. Arrange for someone to handle areas you can't see clearly, and don't start when you're tired or rushed.
Identify What Is Holding the Weft
A weft is the stitched band holding extension hair together. Its attachment determines how to remove it.
Common attachments need different approaches:
| Attachment | What you'll see | Removal approach |
|---|---|---|
| Traditional sew-in | Loops connecting the weft to a braided foundation | Isolate and release the attachment |
| Beaded weft | Small metal beads supporting the weft | Release beads with suitable pliers |
| Sewn beaded weft | Thread passing through or around bead attachments | Release the sewn attachment before removing beads |
A weaving net may cover the foundation braids. Hair can poke through its openings. A lace closure or frontal may have separate stitches around its edges.
Don't assume every attachment matches the first one you find. Trace each row before working on it.
If adhesive also holds a front piece, releasing its sewn attachment won't break that bond. Stop rather than peeling attached lace away from your hairline.
Expose the Tracks and Cut the Thread Safely
1. Protect the leave-out and start at the nape
Separate your leave-out, the natural hair left exposed at the top or edges. Clip it securely away before bringing scissors near the tracks.
Next, clip the extension lengths upward to expose the lowest row at the nape. Work upward, one weft at a time, leaving the side wefts until last.
Keep the section you're handling small enough to see clearly. Your helper should reposition clips as each row comes free, rather than cutting through a crowded section.
2. Identify an isolated stitch before cutting
Feel along the track with your fingertips. The attachment thread forms stitches around the weft and foundation, while your hair continues into the braid.
Color alone isn't reliable because black thread can blend into dark hair. Follow a stitch visually and by touch until you can separate a small length from surrounding strands.
Before cutting, make sure only thread sits between your fingers and the blade. There should be a visible gap between that thread and your hair.
With the blade away from skin, use one scissor blade in a short, controlled sawing motion against the isolated thread. Avoid closing the scissors around a bundle.
If you can't trace the stitch or clearly separate it from hair, don't cut it.
After a few cuts, the sewing may unravel. Use your fingers to ease loose sewing out instead of cutting every stitch.
Release Stuck Thread, Closures, and Netting
3. Follow resistance instead of pulling harder
Support the weft and gently test whether it lifts away. If one point stays attached, follow it back to the remaining stitch.
A thread tail may have caught around another loop. Ease it backward with your fingers rather than dragging it through the braid.
Don't slide scissors blindly beneath a tight knot. Reposition the hair and lighting before using scissors again. If you still can't isolate the attachment, leave it for a stylist.
Product buildup can also make attachments difficult to distinguish. Avoid soaking the braided foundation to loosen them; trapped shed hair still needs careful detangling.
4. Release the front piece and net separately
For a sewn lace closure or front piece, identify and cut the front anchoring knots first. These are the sewing attachments, not the tiny knots holding individual hairs in the lace.
Then release the remaining edge stitches while supporting the piece. Don't lift it against resistance.
For a weaving net, cut its perimeter attachments before lifting the netting. Check for additional attachments across the net, since releasing its outer edge may not free everything.
Keep loose netting away from your scissors. Hair can poke through its openings, so never cut net and unidentified hair together.
Shop Los más vendidos
-
Peluca corta de locs falsos de diosa | Peluca de rastas con reflejos marrones | Peluca de crochet trenzada afro | Cabello sintético
Precio habitual A partir de $158.00 USDPrecio habitual$190.00 USDPrecio de oferta A partir de $158.00 USDOferta -
Peluca frontal de encaje HD de 13x6, rizada, de 30", color borgoña y chocolate, | Peluca de cabello humano de color 99J para mujeres | Onda profunda
Precio habitual A partir de $257.00 USDPrecio habitual$0.00 USDPrecio de oferta A partir de $257.00 USD -
Paquetes de Cabello Humano Malayo Ondulado Profundo 12A | Extensiones de Tejido "Rizo Profundo" Sofisticadas | Opciones Elegantes de Paquetes Individuales/Múltiples de 30-32 Pulgadas | Trama de Cabello Remy "Digna" para un Estilo Radiante y Versátil
Precio habitual $364.00 USDPrecio habitual$0.00 USDPrecio de oferta $364.00 USD -
#350 Knotless Box Braids Wig | Short Lace Frontal Bob | Dark Ombre Ginger
Precio habitual $262.50 USDPrecio habitual$0.00 USDPrecio de oferta $262.50 USD -
Peluca corta de rastas falsas afro | Trenzas sintéticas resistentes al calor | Peluca unisex para mujeres y hombres negros
Precio habitual $90.00 USDPrecio habitual$120.00 USDPrecio de oferta $90.00 USDOferta -
Peluca frontal de encaje HD 13x4 con cabello virgen vietnamita de donante 12A | Densidad del 250% | Doble capa | Ondas voluminosas | Sin pegamento
Precio habitual A partir de $242.00 USDPrecio habitual$0.00 USDPrecio de oferta A partir de $242.00 USD -
Zapatos Derby Wingtip para hombre de Italia | Oxfords clásicos modernos de bloques de color (aumento de altura, piel auténtica)
Precio habitual $263.00 USDPrecio habitual$301.00 USDPrecio de oferta $263.00 USDOferta -
Brazilian Human Hair 13x4 Lace Front Wig | Glueless, Pre-Plucked with Baby Hair
Precio habitual A partir de $99.00 USDPrecio habitual$132.00 USDPrecio de oferta A partir de $99.00 USDOferta





Undo the Braids and Detangle Before Washing
5. Unbraid from the ends toward the roots
Once every weft and attachment is free, undo each foundation section individually. Start at its end and work toward the scalp.
Use your fingers whenever possible. A comb tail can help separate a visible loop, but don't scrape the scalp or force it through a knot.
Don't cut a section shorter to save time. Extension hair and natural hair can overlap, making their boundaries hard to identify.
As you release each section, remove visible sewing remnants and keep it separate.
6. Remove trapped shed hair gently

Before saturating your hair, use your fingers to remove loose shed hair caught during wear. Start at the ends, then gradually work upward.
Next, use a wide-tooth comb with short, gentle passes to ease out tangles. Hold the section above the area you're combing to reduce pulling at the roots.
If dry hair feels brittle or catches, add a little detangler for slip. Don't rake through resistant curls or try to comb everything at once.
Dense mats close to the scalp need professional attention. Wetting and scrubbing them before separating trapped strands can make removal harder.
Shampoo and Deep Condition After Removal
7. Clean the scalp without bunching the lengths
Once loose hair and major tangles are out, wet your hair gently. Apply shampoo to your scalp and massage with your fingertips, not your nails.
Let the lather travel through the lengths. Avoid piling your hair on top of your head, which encourages fresh tangles.
Rinse thoroughly, especially where buildup collected along the former braid parts. Keep your hair in manageable sections throughout washing.
If you're saving the extensions, clean them separately. Our kinky-textured extension care guidance recommends gentle washing and letting the hair dry fully.
8. Condition before styling again
Apply a deep conditioner and leave it on for about 10 to 20 minutes, following its directions if they differ.
While the conditioner provides slip, gently address any remaining tangles. Begin with your fingers, then use a wide-tooth comb only where it moves easily. Rinse thoroughly afterward.
Choose a low-tension style and avoid immediately reinstalling a tight sew-in. The American Academy of Dermatology's hair-loss care tips warn that repeated pulling can cause traction alopecia.
Know When to Stop and Get Help
Stop if removal causes pain, bleeding, or persistent scalp pulling. Also stop if you can't tell thread from your hair, even if one small attachment remains.
A stylist can help with hidden knots, tightly matted roots, or mixed attachment methods. Trying harder can increase the chance of cutting or breaking hair.
See a dermatologist for bald patches, scalp sores, or ongoing tenderness. The AAD's overview of hair loss distinguishes normal shedding from problems that need diagnosis.
Don't use the amount of hair on the floor as your only measure. Scalp symptoms and visible changes in density matter too.
Protect Your Hair Through the Entire Takedown
Safe sew-in removal starts with identifying each attachment before cutting or releasing it. Clear visibility matters as much as careful hands.
Work slowly through the tracks, braids, and trapped shed hair. If you feel pain or aren't sure what to do, leave the attachment for a professional rather than risk your hair.
Sew-In Removal FAQ
How long does it take to remove a sew-in?
Just Mi!'s personal takedown account reported about 30 minutes to cut the threads and remove extensions, followed by 30 to 45 minutes to unbraid.
Those timings aren't a deadline. Detangling, washing, and conditioning add time, while tight stitching or matting can extend the process considerably. Leave enough time so you won't feel pressured to rush the final rows.
Can I safely remove a sew-in by myself?
A helper or stylist is the safer choice, especially when cutting attachments at the back. Secret Hair Extensions advises against cutting a weave out alone.
Mirrors improve visibility, but they don't make hidden stitches easy to isolate. If you're working alone and can't clearly see both the attachment and nearby hair, stop before cutting. Familiarity with your installation doesn't replace a clear view.
Why is there so much shedding afterward?
Shed strands stay trapped inside braids and under netting until removal, so several weeks' accumulation can look substantial.
Secret Hair Extensions cites up to 150 shed hairs daily. The AAD describes normal daily shedding as roughly 50 to 100 hairs. These figures aren't a way to diagnose the amount of hair you lose during removal. Numerous short broken pieces, thinning patches, or ongoing heavy hair loss deserve attention.
Can bead-attached wefts come out without scissors?
A bead-only weft can release without cutting when suitable extension-removal pliers open or crush the beads so they slide free. However, this doesn't work if sewing thread passes through the bead.
Don't yank a resistant ring or push it farther up the hair. Have a trained helper or stylist release unfamiliar attachments, then discard used micro rings rather than reusing them.