

How to Clean Makeup Brushes for Smoother Makeup
A clean makeup brush can change the way your foundation, blush, and eyeshadow sit on your skin. When you clean makeup brushes regularly, you remove old pigment, facial oil, and product buildup that can make application patchy.
Dirty bristles can also feel rough, spread yesterday's makeup, and transfer residue around your face. The right routine takes only a few minutes, but gentle washing and proper drying protect the brush shape and adhesive. Start with the supplies you need, then follow these simple steps.
Why Clean Makeup Brushes Matter for Better Application
Makeup brushes collect more than visible product. Each use can leave behind oil, moisturizer, sunscreen, dead skin cells, and loose powder. That buildup coats the bristles and changes how they pick up and release makeup.
A foundation brush with dried cream product may drag across the skin instead of blending smoothly. An eyeshadow brush can muddy a fresh shade when leftover pigment remains between the fibers. Clean bristles move more freely, so you get more even coverage and better color control.
Regular washing also helps reduce the amount of residue that touches your face and eyes. It can't replace good skincare or handwashing, but it supports a cleaner makeup routine. Avoid sharing eye brushes, especially when someone has eye irritation or an infection.
The brush itself benefits too. Product left in the bristles can make them stiff and brittle over time. Washing with mild cleanser, rinsing thoroughly, and drying carefully helps preserve the softness and shape you paid for.
A brush can look clean on the surface while foundation and concealer remain trapped near the ferrule, so rinse dense brushes longer than fluffy powder brushes.
Supplies and a Simple Cleaning Schedule
You don't need an expensive tool to wash makeup brushes. Gather a mild brush cleanser or gentle, fragrance-free liquid soap, lukewarm water, a clean towel, and a small bowl if your sink lacks space.
A textured silicone cleaning mat can loosen stubborn residue, but your palm works well for occasional washing. Keep paper towels nearby for wiping excess cream product before water touches the brush.
Your schedule should match the product and the area where you use the brush. Use this quick reference:
| Brush type | Suggested cleaning schedule | Extra care |
|---|---|---|
| Complexion brushes | Once a week, or twice weekly with daily use | Wash dense foundation and concealer brushes thoroughly |
| Eye brushes | Once a week for powder products | Wash after each use when used with cream or gel products |
| Cream-product brushes | After every use | Remove residue before it dries inside the bristles |
Cream formulas harden quickly, so waiting several days makes cleaning more difficult. Powder brushes can usually wait longer, but weekly washing keeps pigment and oil from accumulating.
Spot-cleaning spray can help between full washes when you need to change eyeshadow colors. Follow the product label, let the bristles dry completely, and still give the brush a proper wash on its regular schedule.
How to Clean Makeup Brushes Step by Step
Use a light touch throughout the process. Scrubbing, twisting, or soaking the entire brush can damage the bristles and weaken the glue inside the ferrule.
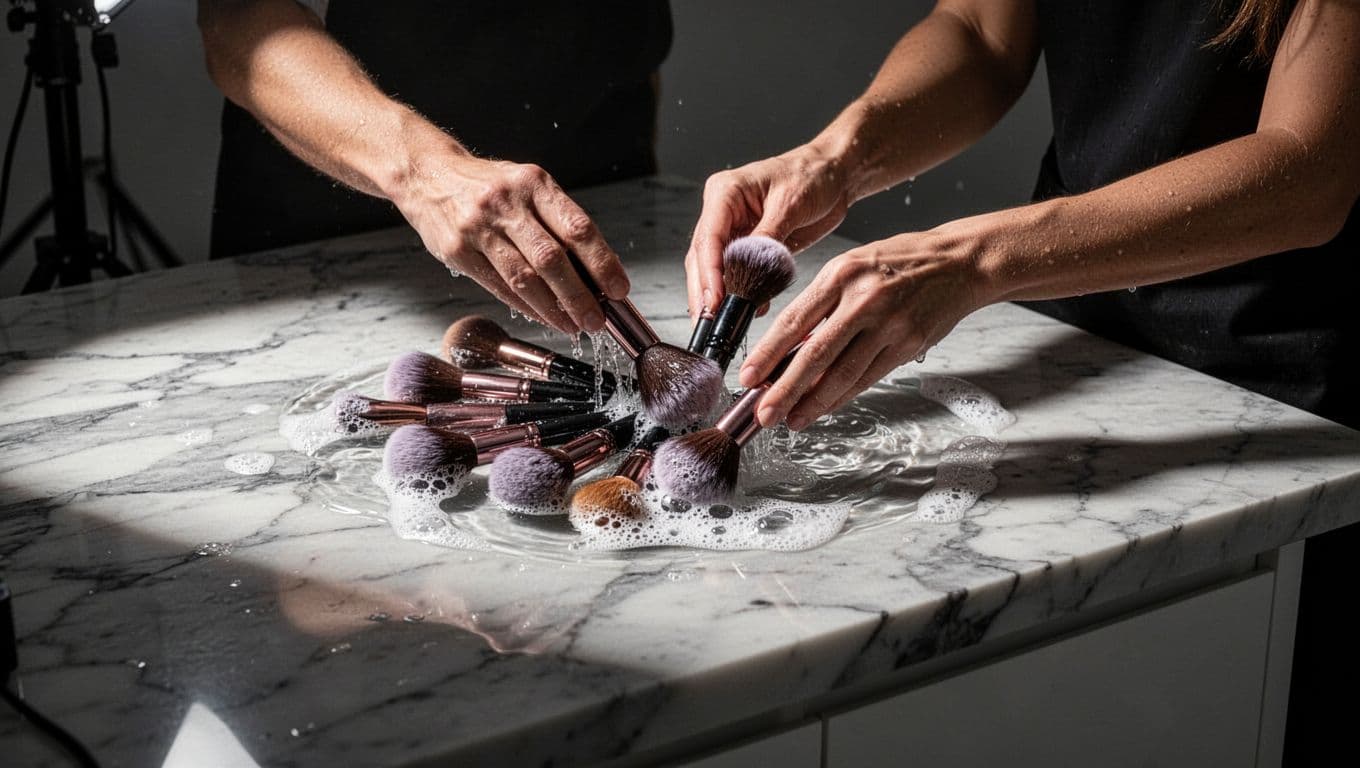
- Remove dry buildup first. Wipe cream foundation, concealer, or lipstick residue onto a tissue. For powder brushes, gently tap the handle against your palm over a towel. Avoid pulling at individual hairs or scraping the bristles with your nails.
- Wet only the bristles. Hold the brush under lukewarm running water with the bristles pointing downward. Keep water away from the ferrule and handle joint. Hot water can loosen the adhesive, while an upward angle can push moisture into the handle.
- Apply a small amount of cleanser. Place brush cleanser or mild liquid soap in your palm, on a cleaning mat, or in a shallow bowl. A small amount is enough for most brushes. Add more only when thick product remains.
- Massage gently. Move the brush in small circles over your palm or mat. Use soft pressure and work through the full length of the bristles. Don't flatten a rounded brush or bend a flat brush sharply. For a dense foundation brush, press the bristles lightly into your palm so the cleanser reaches the center.
- Rinse until the water runs clear. Hold the brush under lukewarm water, bristles facing down, while gently squeezing the fibers with your fingers. Rinse away every trace of soap. Any remaining cleanser can leave the brush stiff or cause makeup to apply unevenly.
- Repeat when needed. Foundation, cream blush, concealer, and waterproof products often require a second wash. If the rinse water still looks cloudy or the bristles feel slippery, add a little more cleanser and repeat the massage.
- Remove excess water carefully. Press the brush between clean fingers or fold it inside a towel and squeeze softly. Never twist the bristles, wring them out, or pull them away from the ferrule.
Brushes with natural hair may need especially gentle treatment because their fibers can dry out. Synthetic brushes usually handle cream products well, but they still need careful rinsing because dense fibers hold residue near the base.
Reshape and Dry Brushes Without Damaging Them
Drying is part of cleaning, not an afterthought. Water trapped in the ferrule can soften glue and create a loose handle over time. A brush that dries standing upright may also allow moisture to travel downward.
After squeezing out excess water, use your fingers to reshape the bristles. Restore the original rounded, angled, tapered, or flat profile. If the tips look uneven, smooth them gently before placing the brush down.
Lay each brush flat on a clean, dry towel with the bristles extending slightly beyond the edge of a counter. This position allows air to reach the entire brush head. You can also place brushes on a drying rack designed to hold them with the bristles facing downward.
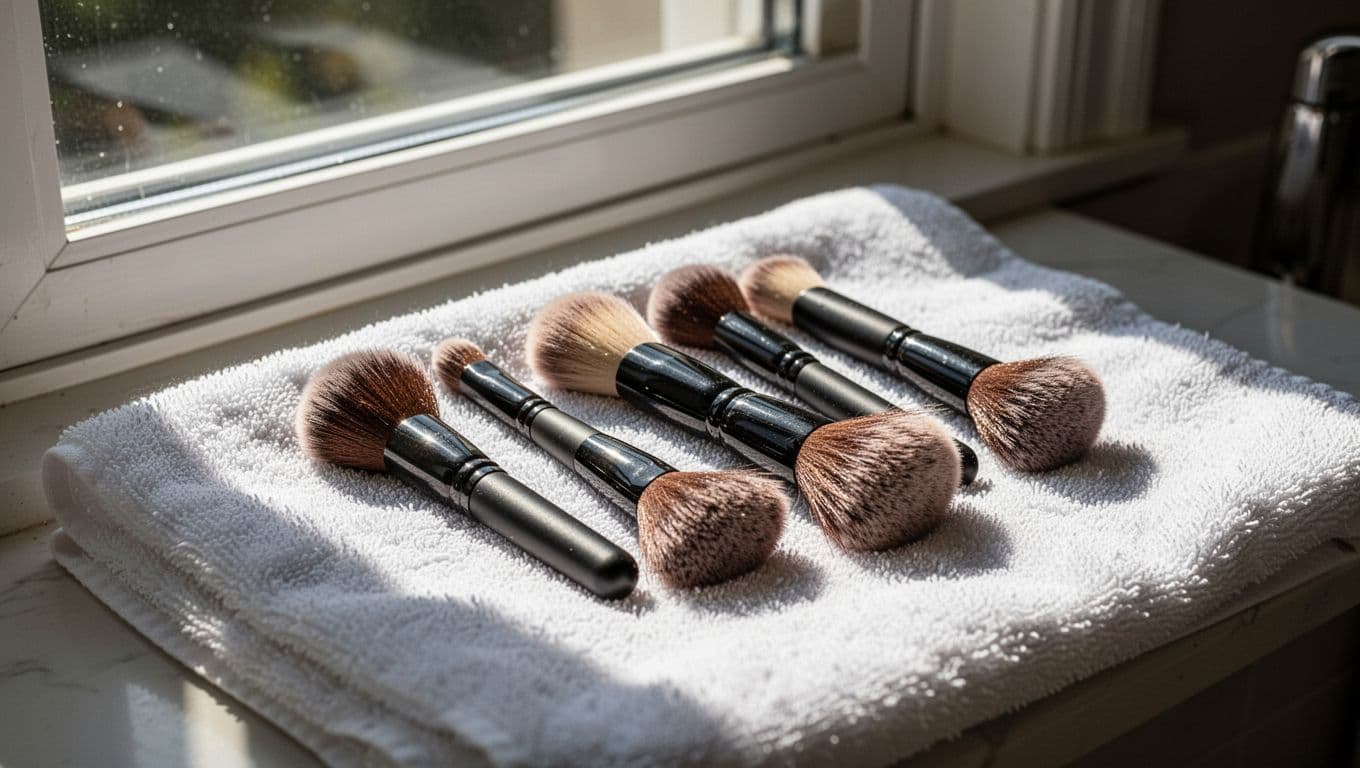
Avoid drying brushes on a radiator, under a hair dryer, or in strong direct heat. Heat can make bristles rough and may affect the adhesive. A well-ventilated room is better than a closed drawer or damp bathroom cabinet.
Leave brushes alone until they feel completely dry. Small eye brushes may dry within several hours, while thick complexion brushes often need overnight drying. Don't return a damp brush to a makeup bag, because trapped moisture can create an unpleasant odor and slow the drying process.
Once dry, store brushes upright in a clean holder with the bristles uncovered. Keep them away from the sink and toilet area, where splashes and airborne particles can settle on the fibers.
Shop Best Sellers
-
Short Goddess Faux Locs Wig | Brown Highlight Crochet Dreadlock Wig
Regular price From $158.00 USDRegular price$190.00 USDSale price From $158.00 USDSale -
30 Inch Burgundy 99J Curly Human Hair Wig | 13x6 Lace Frontal | 200% Density
Regular price From $257.00 USDRegular price$0.00 USDSale price From $257.00 USD -
12A Deep Wave Remy Human Hair Bundles | 30 to 32 Inch Weft Extensions
Regular price $364.00 USDRegular price$0.00 USDSale price $364.00 USD -
#350 Knotless Box Braids Wig | Short Lace Frontal Bob | Dark Ombre Ginger
Regular price $262.50 USDRegular price$0.00 USDSale price $262.50 USD -
Short Afro Faux Dreads Wig | Synthetic Braided Wig for Men and Women
Regular price $90.00 USDRegular price$120.00 USDSale price $90.00 USDSale -
12A Raw Vietnamese Bouncy Wave Wig | 13x4 Lace Frontal | 250% Density
Regular price From $242.00 USDRegular price$0.00 USDSale price From $242.00 USD -
Men's Wingtip Derby Shoes | Genuine Leather Colour Block Lace-Ups
Regular price $263.00 USDRegular price$301.00 USDSale price $263.00 USDSale -
Brazilian Human Hair 13x4 Lace Front Wig | Glueless, Pre-Plucked with Baby Hair
Regular price From $99.00 USDRegular price$132.00 USDSale price From $99.00 USDSale














Common Mistakes That Damage Makeup Brushes
The most common mistake is soaking the entire brush. Submerging the handle, ferrule, and bristles can force water into the joint. Wash the bristle section instead, and keep the ferrule as dry as possible.
Using hot water or harsh household cleaners can strip natural oils from hair fibers and affect synthetic softness. Dishwashing liquid may remove grease, but it can be too drying for frequent brush care. A mild brush cleanser is a safer everyday choice.
Aggressive scrubbing causes unnecessary wear. You don't need to grind the brush against a hard surface. Gentle circular motions and a complete rinse remove most buildup without rough treatment.
Another mistake is skipping the final rinse. Soap left in the brush may change the texture of the bristles and mix with your next makeup application. Run water through dense brushes until it feels clean and the rinse water looks clear.
Finally, don't use a brush while it's still damp. Moist bristles can pick up too much powder, dilute liquid makeup, and encourage uneven application. Give the brush enough time to dry before putting it back into rotation.
Keep Your Brushes Cleaner Between Washes
A few small habits reduce buildup between full washes. Use clean hands when applying makeup, close cream and liquid products after each use, and avoid placing used brushes directly on a bathroom counter.
For eyeshadow brushes, wipe powder residue onto a clean tissue or microfiber cloth between shades. This won't replace washing, but it helps prevent dark pigment from muddying lighter colors. Use a separate brush for cream eyeliner or wash the brush immediately after use.
Keep clean and dirty brushes in separate areas. A breathable cup or holder is better for dry brushes than a sealed pouch. Wash makeup bags and brush rolls according to their care instructions, since clean bristles can pick up residue from a dirty case.
Inspect your tools during each wash. Persistent odor, shedding, cracked handles, or rough bristles can mean a brush needs replacement. A damaged brush may scratch the skin and won't apply makeup evenly, even after cleaning.
Conclusion
The best way to clean makeup brushes is gentle and consistent. Use lukewarm water, mild cleanser, careful rinsing, and light pressure throughout the process. Reshape the bristles, then dry every brush flat or with the bristles facing downward to protect the ferrule and adhesive.
Wash complexion brushes at least weekly, clean eye brushes regularly, and wash cream-product brushes after every use. With that routine, your tools stay softer, your makeup blends more evenly, and each application starts with a cleaner surface.