

How to Keep Braiding Hair From Tangling During Installation
Managing loose fibers helps prevent braiding hair tangling during installation. Prepare the bundle, section carefully, and keep a consistent grip to reduce wasted hair.
Natural hair texture and extension fiber both affect preparation, so handle each separately. Keep unused portions secured as you work.
Why tangles form during braiding
Hair can knot before you begin adding extensions. Dryness and friction roughen the hair surface, while shed strands can get trapped among curls or waves.
Shed hairs collect in curls and waves
Most people have around 100,000 hairs on their head at one time. The American Academy of Dermatology's guidance on normal shedding puts typical daily shedding at 50 to 100 hairs. On wash day, long or thick hair may release 150 to 200 accumulated strands at once.
Straight hair often lets shed hairs fall away. Curly hair and wavy hair can hold them in place, where they twist around neighboring strands and form knots. Detangling before you section prevents loose hairs from getting pulled into a braid.
Dryness and damage increase friction
Hair's outer cuticle consists of overlapping scales. When hair is dry or damaged, those scales can lift and catch against other fibers, making tangles more likely. A review of hair-care science describes how cuticle condition affects the hair shaft.
Split ends snag on nearby hair, and regular trims can help manage them. Braids can limit movement, but a tight ponytail, bun, or braid can add strain and encourage knots near the roots. The difference is tension: a loose braid can reduce friction, while a painful or overly tight style puts stress on the hair.
Prepare the natural hair and extensions
Begin with clean, fully detangled hair and a clear work surface. Preparation helps prevent knots in your natural hair and keeps loose braiding hair from catching on clips, clothing, or other bundles.
Detangle and section your natural hair
Apply a leave-in conditioner or detangler to natural hair for slip, following the product directions. Gently detangle wavy hair, then divide it into manageable sections and secure each one with a clip or soft tie. Keep the sections you aren't braiding out of the way without pulling at the hairline.
For a wash-day install, gently squeeze out water with a T-shirt or microfiber towel. Don't rub wet hair with a regular towel. Wet strands stretch easily, so detangle them with your fingers or a wide-tooth comb rather than brushing hard.
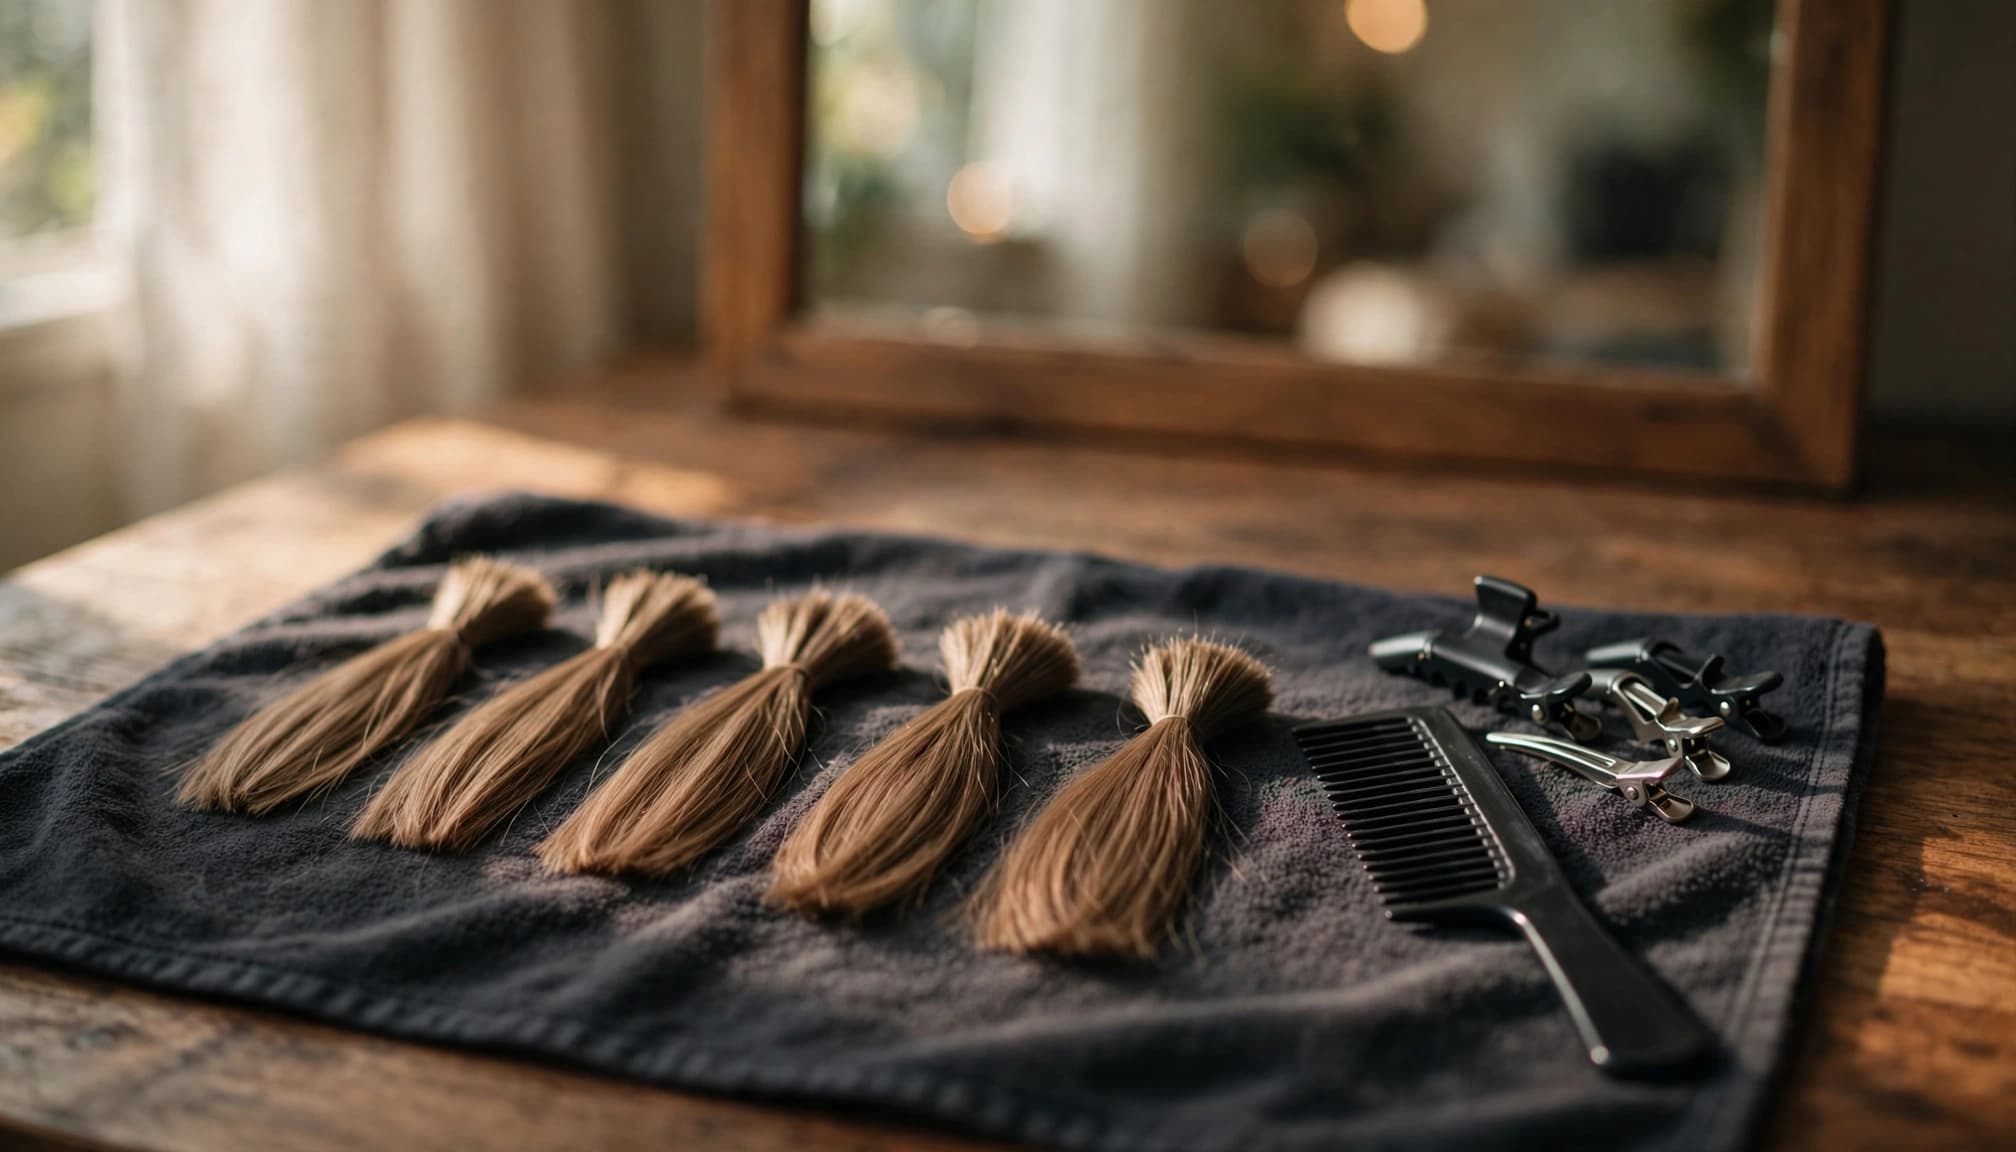
Check the extension fiber before adding products
Set the bundle on a clean, dry towel or another surface where it won't slide to the floor. Remove packaging ties carefully, then smooth the hair with your fingers. If it needs more detangling, work from the ends upward in small sections with a wide-tooth comb.
Use conditioner, heat, or other styling products on synthetic extensions only when the manufacturer's care instructions approve them. Some braiding hair is made for hot-water setting, while other fibers can deform or frizz with heat. Follow the care directions for your specific hair, including which products to avoid. For related guidance, see how to safely heat-style synthetic wigs.
Separate and hold the bundle as you install
Secure the full unused bundle before you start. A loose bundle on your lap or chair can cause tangling whenever you reach for a piece. Prepare only the portion needed for the next braid.
Make small, even portions
Divide the bundle gently into small portions sized for each braid. Pull the fibers apart with your fingers instead of yanking out a thick clump. Lay each portion in the same direction, align the ends, and clip or contain the unused portions.
For knotless or box braids, start with smaller portions than you think you need. Add extension hair in stages, since an oversized piece is harder to control and more likely to snag on natural hair.
Keep the working portion organized
Prepare one portion at a time. Hold it near its midpoint or fold, keeping the loose lengths on a towel or hanging freely without dragging or crossing neighboring fibers. Keep the ends together, and don't twist the extension hair into a tight ball between steps. After each braid, contain any remaining loose hair before reaching for the next section.
If you notice knots or a snag, stop and detangle it before continuing. Pulling the extension hair through a snag can tighten it and make it harder to remove without frizz or breakage.
Use a steady grip and braid in small sections
Working with one braid at a time helps you control the natural hair and extension fibers. It also limits how much loose hair can rub together.
Add extensions gradually
After separating a clean section of natural hair, smooth the prepared extension piece into the braid using your usual technique. Keep the strands distinct as you cross them, and add more hair in small amounts if needed. Keep the extension ends away from neighboring sections.
Pause if the braid starts to snag. Loosen your grip, find where the fibers crossed or wrapped together, and separate them with your fingers. A comb can help with loose extension hair, but don't comb through an extension braid while it's attached to the scalp.
Keep tension comfortable
Each section should feel secure without pain, pulling, or tightness at the hairline. Excessive tension can stress the roots and contribute to hair breakage, especially around the edges. The AAD's advice on hair-care habits that can cause damage warns against tugging and tight styling.
If a section hurts, feels unusually tight, or causes bumps near the roots, loosen or redo it. A neat install doesn't depend on pulling the natural hair taut.
Detangle knots without pulling at the roots
If natural hair tangles during installation, pause instead of braiding through the knot. Careful detangling protects the roots and keeps a small snag from turning into a matted section.
Start at the ends and work upward in small sections. Use your fingers to loosen the knot, then apply leave-in conditioner or detangler for more slip. Once the ends move freely, work higher along the section with a wide-tooth comb or brush.
Never brush from the roots down. That pushes knots toward the ends and pulls against the roots. On wet hair, use a wide-tooth comb gently, since wet strands stretch and break more easily.
A weekly hair mask can add moisture beyond your regular rinse-out conditioner and make dry natural hair easier to manage. Regular trims can remove split ends that snag on nearby strands. A hair mask won't replace detangling before installation, so use it on natural hair as directed and keep it off extension fibers unless the manufacturer approves it.
Shop Best Sellers
-
Short Goddess Faux Locs Wig | Brown Highlight Crochet Dreadlock Wig
Regular price From $158.00 USDRegular price$190.00 USDSale price From $158.00 USDSale -
30 Inch Burgundy 99J Curly Human Hair Wig | 13x6 Lace Frontal | 200% Density
Regular price From $257.00 USDRegular price$0.00 USDSale price From $257.00 USD -
12A Deep Wave Remy Human Hair Bundles | 30 to 32 Inch Weft Extensions
Regular price $364.00 USDRegular price$0.00 USDSale price $364.00 USD -
#350 Knotless Box Braids Wig | Short Lace Frontal Bob | Dark Ombre Ginger
Regular price $262.50 USDRegular price$0.00 USDSale price $262.50 USD -
Short Afro Faux Dreads Wig | Synthetic Braided Wig for Men and Women
Regular price $90.00 USDRegular price$120.00 USDSale price $90.00 USDSale -
12A Raw Vietnamese Bouncy Wave Wig | 13x4 Lace Frontal | 250% Density
Regular price From $242.00 USDRegular price$0.00 USDSale price From $242.00 USD -
Men's Wingtip Derby Shoes | Genuine Leather Colour Block Lace-Ups
Regular price $263.00 USDRegular price$301.00 USDSale price $263.00 USDSale -
Brazilian Human Hair 13x4 Lace Front Wig | Glueless, Pre-Plucked with Baby Hair
Regular price From $99.00 USDRegular price$132.00 USDSale price From $99.00 USDSale





Protect installed braids between sessions
The style reduces loose-hair movement when worn with low tension, but it doesn't prevent friction or root knots. A simple bedtime routine helps protect the hair and the style.
Gather the lengths loosely into a low bun or braid with a satin scrunchie or other soft, thick hair tie. Don't use a thin elastic that can catch strands, especially when hair is damp. A satin pillowcase reduces friction compared with cotton, though it won't prevent every knot.

In the morning, separate the lengths gently with your fingers before styling. If the roots feel matted, don't tug or pull a comb through the installed hair. Loosen the affected area carefully, and avoid heavy products that leave buildup. Regular trims can remove split ends before the next install, since damaged ends catch more easily.
Key takeaways
- Prepare natural hair by detangling from the ends upward and securing small sections.
- Separate braiding hair into manageable portions, keeping unused fibers covered or clipped away.
- Stop and loosen a snag instead of braiding through it.
- Keep tension comfortable, and follow the manufacturer's directions for synthetic hair.
- Use a low bedtime style and satin or silk to reduce friction.
Frequently asked questions
How do I detangle braids without breakage or pain?
For installed braids, use your fingers to separate loose strands or a small snag. Don't brush from roots to ends or tug a comb through the braid. If you're removing braids, undo them one at a time, separate extension hair from natural hair, and detangle each natural-hair section from the ends upward. Add detangler or leave-in conditioner for slip.
Is two months too long to keep braids in?
Two months is around the upper end of a common wear period. As braids grow out, shed hairs can collect near the roots and knot together. If your scalp is tender, roots are matting, or the style is difficult to separate, take the braids down sooner. Avoid leaving them in once the new growth and loose hairs are becoming hard to manage.
What hair type shouldn't get braids?
No hair texture is automatically unsuitable for the style. However, fragile, damaged, or actively breaking hair may need a lower-tension style or a break from extensions. The braid size and weight matter too. If installation causes pain or pulls at the edges, loosen it or choose a lighter style.
Does a satin pillowcase prevent overnight tangles?
It can reduce friction, particularly for long, curly, or coily hair, but it won't stop tangling completely. A loose low braid or bun also limits movement. If you still wake up with knots, check whether the style is too loose, too tight, or rubbing against bedding.
Is leave-in conditioner better than a weekly hair mask?
They do different jobs. Leave-in conditioner adds slip when detangling and can help during installation. A weekly mask provides deeper conditioning for dry natural hair, but it isn't a substitute for detangling before braiding. Keep both products off synthetic extensions unless the manufacturer approves them.
Keep the installation controlled
Loose fibers and rushed handling can make installation harder to control. Prepare the natural hair, separate extensions into small portions, and secure everything you aren't using.
Pause whenever a snag forms, and detangle from the ends upward instead of pulling at the roots. Comfortable tension and fiber-appropriate care help limit tangling and protect your natural hair.